Note: This feature is available Control 4.40.1040.2301 versions and later.
Concept
Basic guide for configuring the ability to email from Control using GMail settings.
Cautions
Be sure that the Control directory contains the necessary DLLs so that GMail's TLS functions will work correctly. (libeay32.dll, ssleay32.dll)
If those DLLs aren't resident in the Control directory:
- For Control 5.1 or later (5.1, 5.5, etc.), click this control5-1gmaildlls.zip to download them.
- If not using Control 5.1 or later (4.6 and prior), click this gmaildlls.zip to download them.
Once downloaded, extract the two DLLs into the Control directory, restart Control, then proceed with following setup steps.
Screen
{{::gmailemailnewsettings.jpg?nolink&|}}
To set the global setting:
- Open Control
- Click on Setup > System Setup.
- Click on Email Options.
- Click on the Edit button on the right side toolbar.
- Click on the drop down list for Email delivery option: and select Internal.
- Fill in the your Email Address.
- Enter smtp.gmail.com in the SMTP Address.
- Select the Use TLS item in the SMTP / TLS drop down.
- Enter 587 for the TLS Port.
- Fill in the Username for your GMail account.
- Fill in the Password for your GMail account.
- Check the Authentication required checkbox.
- Click on the Save button on the right side toolbar
- Click the Send Test Email button.
- If you get an Email Sent pop-up, click OK. You are now done configuring your email, if not, verify the Username and Password are correct.
To set the user setting:
- Open Control
- Click on Setup > User Options.
- Click on Email Options.
- Click on the Edit button on the right side toolbar.
- Click on the drop down list for Email delivery option: and select Internal.
- Fill in the your Email Address.
- Enter smtp.gmail.com in the SMTP Address.
- Select the Use TLS item in the SMTP / TLS drop down.
- Enter 587 for the SMTP Port.
- Fill in the Username for your GMail account.
- Fill in the Password for your GMail account.
- Check the Authentication required checkbox.
- Click on the Save button on the right side toolbar
- Click the Send Test Email button.
- If you get an Email Sent pop-up, click OK. You are now done configuring your email, if not, verify the Username and Password are correct
Troubleshooting Errors
Error: “Please log into web application”
Solution: See this page and click the link about allowing less secure apps to access your Google account
Error: “Error connecting to SMTP: Socket Error # 10060 || Connection timed out.”
Solution: Verify the TLS Port setting is set to 587.
Error: “Failed to authenticate SMTP. Verify the email settings”
Solution: Verify the SMTP / TLS is set to Use TLS and the TLS Port is set to 587.
Error: “Error connecting to SMTP: Socket Error # 11004”
Solution: Verify the SMTP address is set to smtp.gmail.com
Error: “Error sending email: Username and Password not accepted. Learn more at …”
Solution: Verify the User name and Password are correct.
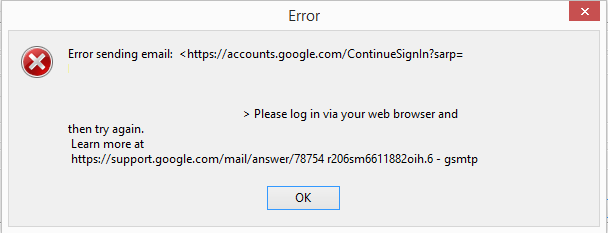
Error: Error sending email: Please log in via your web browser and then try again. Learn more at https://support.google.com/mail/answer/78754
Solution Visit this page for more information https://support.google.com/mail/answer/78754. In most cases the option to “allow less secure apps access” may need to be enabled. This article discusses more details on turning on that feature. https://support.google.com/accounts/answer/6010255
Error: Attachments send but are displayed as source code
Solution: Verify the 'MIME Content Type' in System Setup>Email Options has multipart/mixed set. This setting should be set even if only individual employee emails are being used without a global email set.
Source
Contributor: Development, Cyrious Software
Date: 03/06/2015
Version: Control 4.40.1004.2301