How to use Gmail with OAuth2
Introduction
The purpose of this document is to walk users through the setup process of creating an OAuth2 secured app on their Gmail account which will be required starting May 30, 2022 in order to send email from Gmail out through Control.
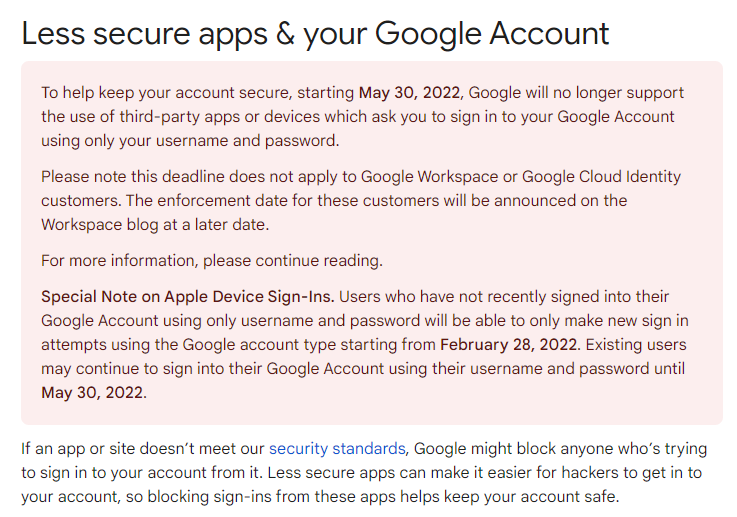
For more info on this requirement, click here.
This document will walk you through the steps needed in both your web browser, as well as in Control.
Important Note: You will need version 06.10.2205.2701 or higher of Control in order to use Gmail after May 30, 2022.
Setup from your browser:
This section will walk you through the necessary steps inside of your web browser:
- Log into Gmail
- Open a new browser tab and go to console.cloud.google.com

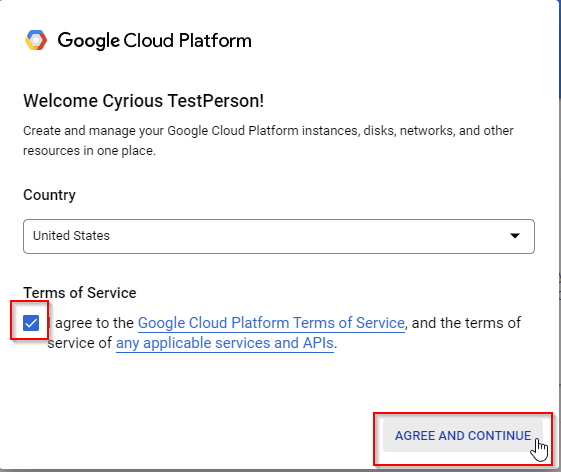
- Check the Terms of Service box to Agree and Continue when presented with the Google Cloud Platform Terms of Service screen
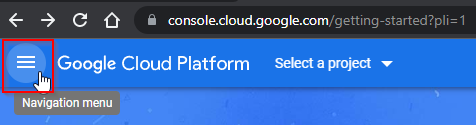
- Click the menu on the top-left side if it is not already open
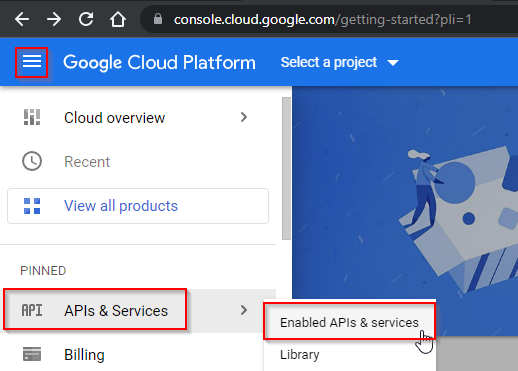
- Hover over APIs & Services and then select Enabled APIs & services
- To the right side of the window, click Create Project

- Enter in a Project name of your choice (Example: MyOAuth).
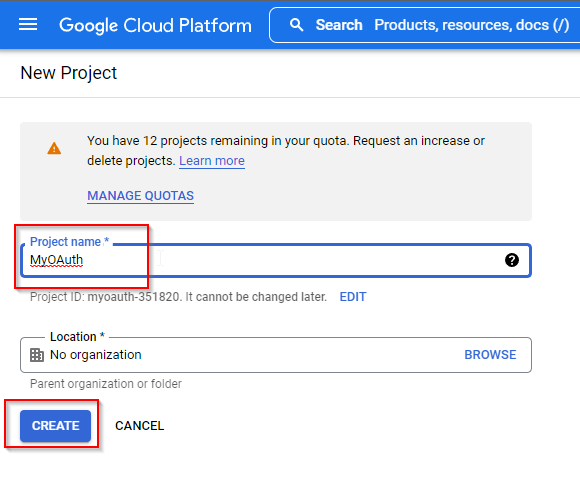
- Click the Create button - This will take a moment to finish.
- Select your project from the list directly next to the words Google Cloud Platform > Click on your project and then click Open
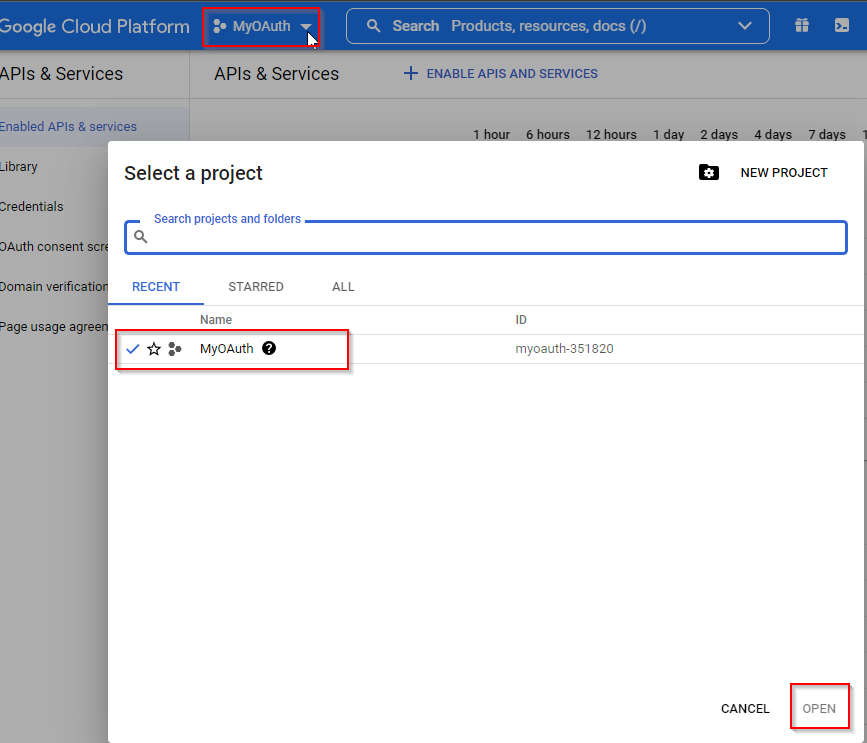
- Click on Credentials on the left side
- Click Create Credentials and choose OAuth client ID

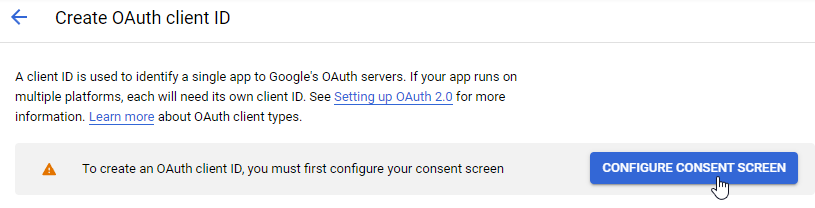
- Click on the Configure Consent Screen button
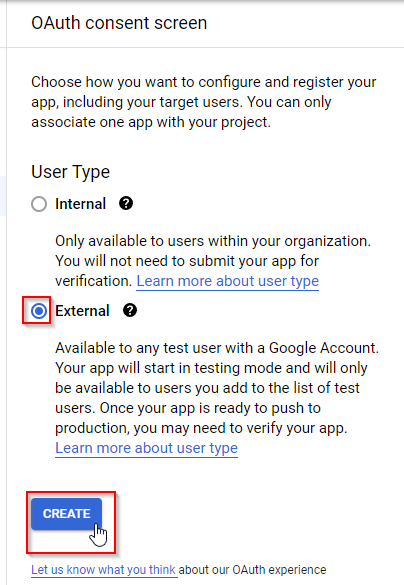
- For User Type, choose External and then click on the Create button
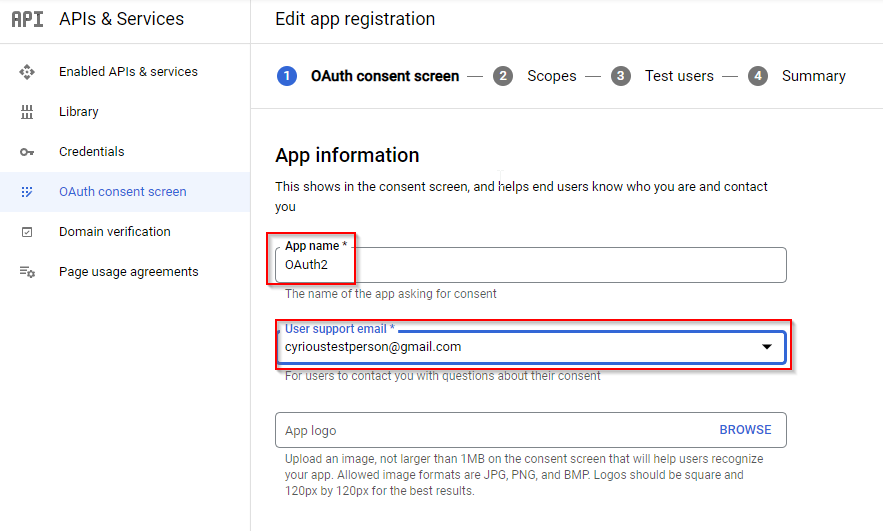
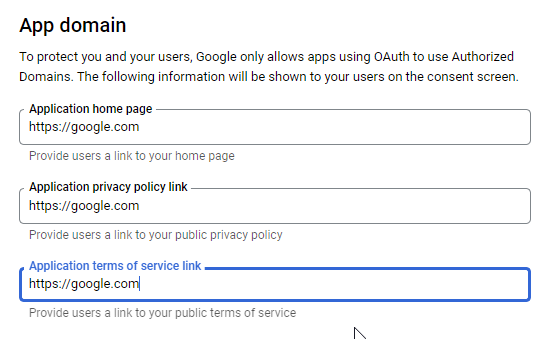
- In the App Information section, enter your App name (OAuth2) > Select your Email address for the Gmail account. No App logo is needed.
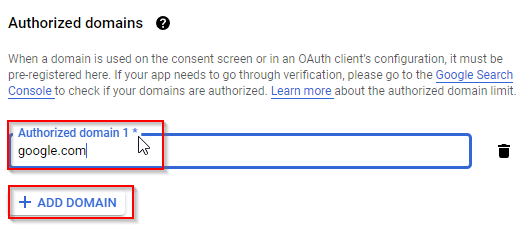
- For the Authorized domains section, click the Add Domain button and then enter google.com
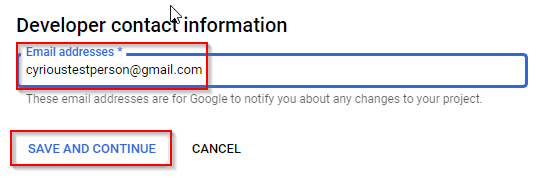
- In the Developer contact information section, enter your Gmail address and then click the Save and Continue button at the bottom of the screen
- Click Save and Continue twice more at the bottom to finish with these screens.
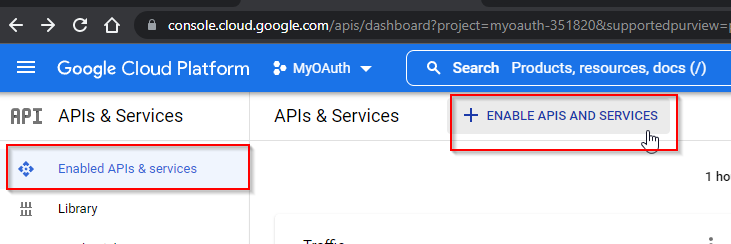
- From the menu on the left side, choose Enabled APIs & services and then click on the Enable APIs And Services button at the top
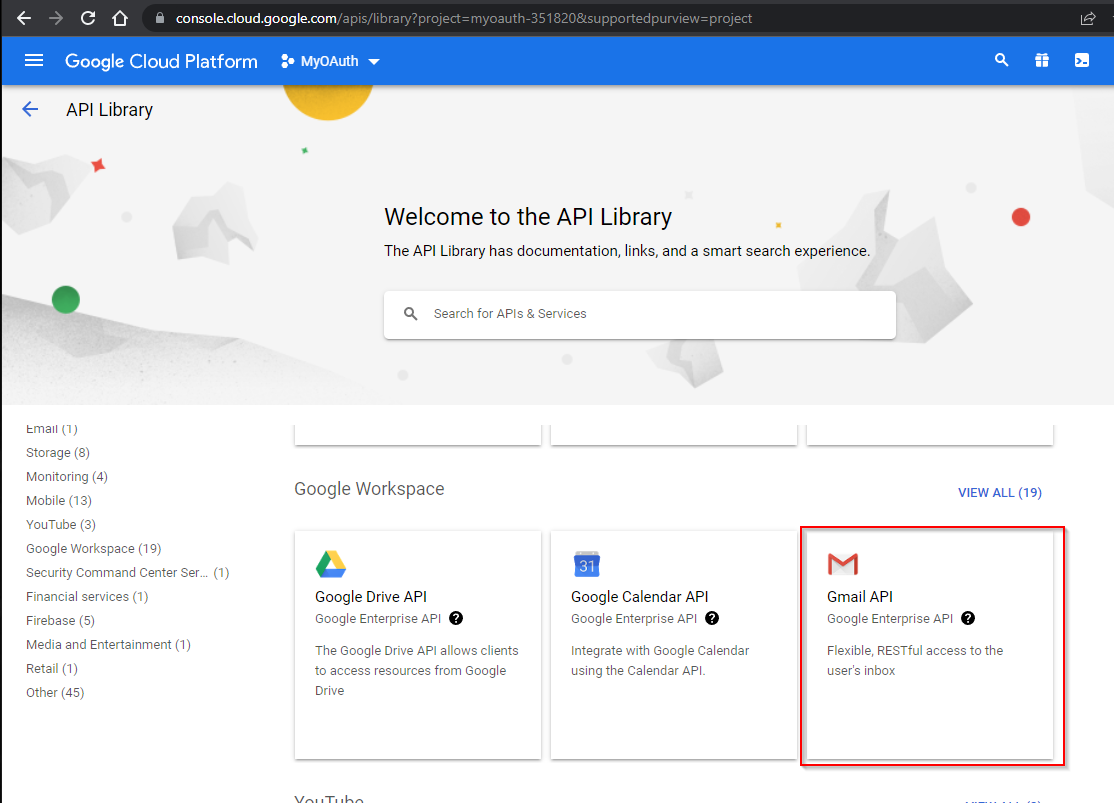
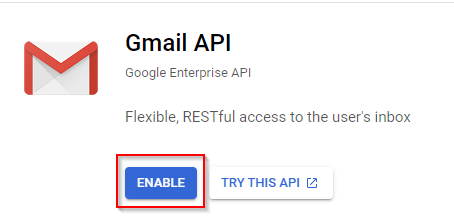
- In the API Library screen, scroll down and select the Gmail API and then click the Enable button on the screen that comes up. This takes a moment to complete.
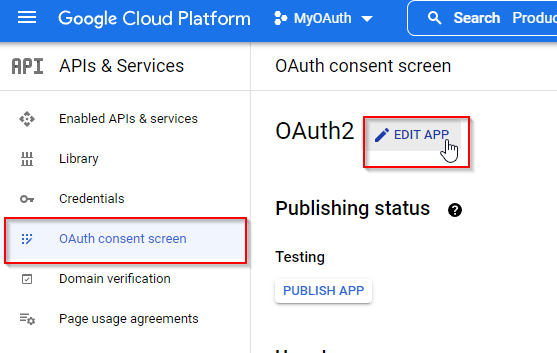
- Choose OAuth consent screen from the left menu and then click on the Edit App button for the App name you entered previously
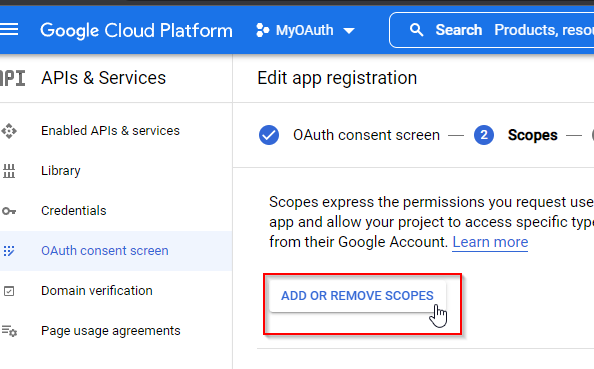
- Scroll to the bottom of the center screen and then click Save and Continue to get to the Scopes page. Click on the Add Or Remove Scopes button
- Click on the next arrow twice to find the Gmail API selection with the following Scope - https://mail.google.com
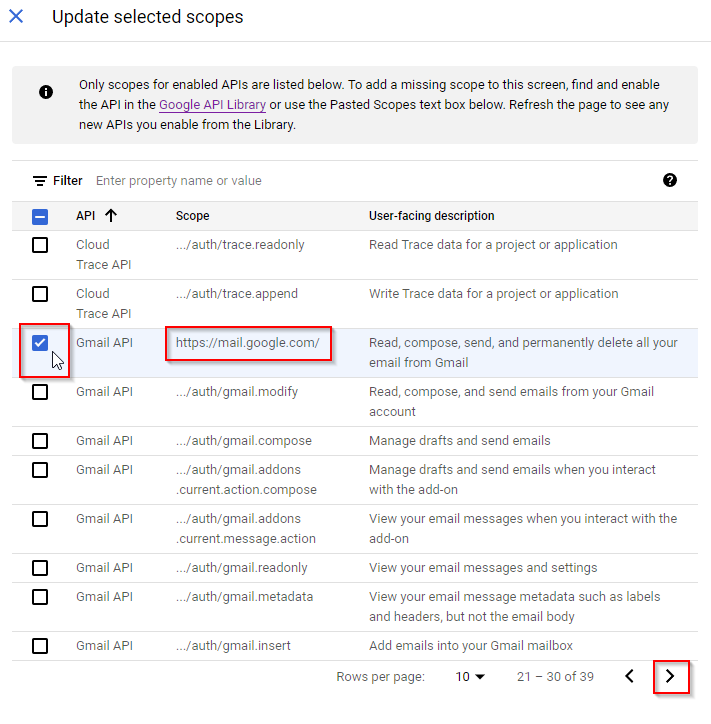
- Click on the Update button at the bottom and then on Save and Continue at the bottom of the next page.
- Go to OAuth consent screen and click the Publish App button. Click Confirm to publish your app
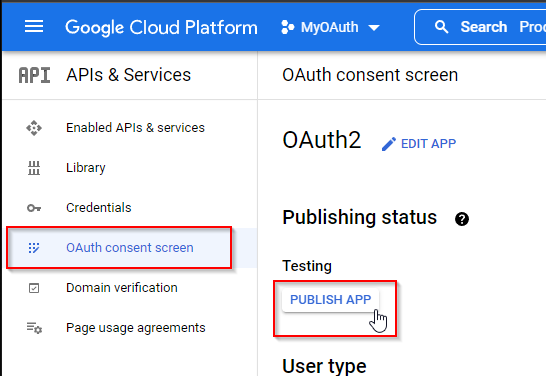
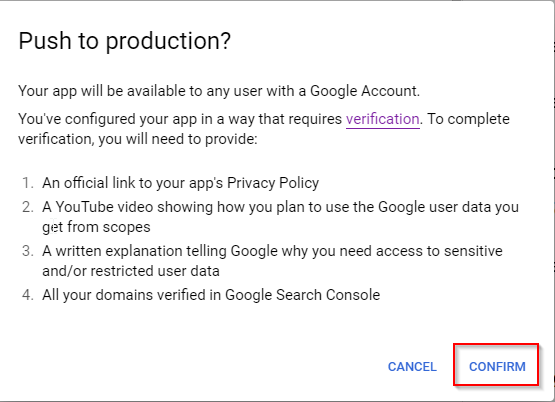
- Choose Credentials from the left menu > Click Create Credentials at the top > Choose OAuth client ID
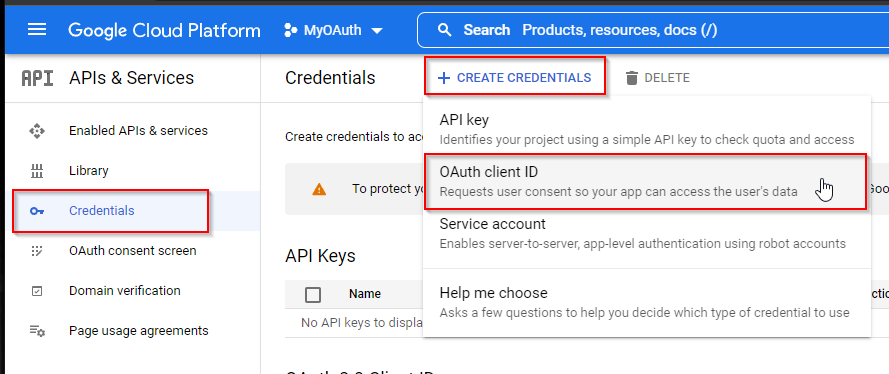
- From the Application type selection list, choose Desktop app > Any name is fine (Control) > Click Create
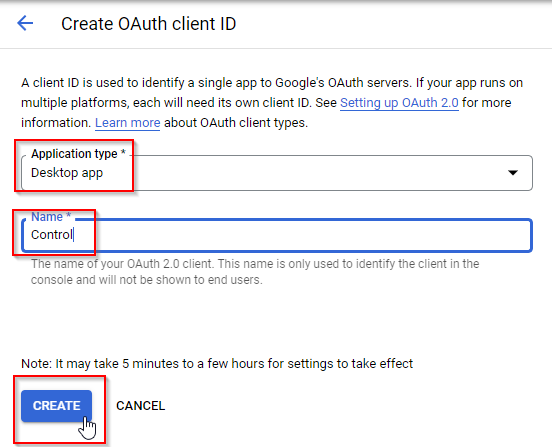
- You are now provided with your Client ID and your Client Secret. Copy both entries into a blank text document for use in just a moment inside of Control.

- Click OK to close out of this screen once you have your info copied over to a text document.
- Now we will move over to the Control program to enter this Client info for your app.
Setup in Control
This section will walk you through the necessary steps inside of Control:
- Go into Control > Setup > System Setup > Company Email > Edit
Note: This will need to be done in the User Options section if you are using a unique Gmail account for every user. (Setup > User Options > Email Options) - Enter in your Client ID and Client Secret
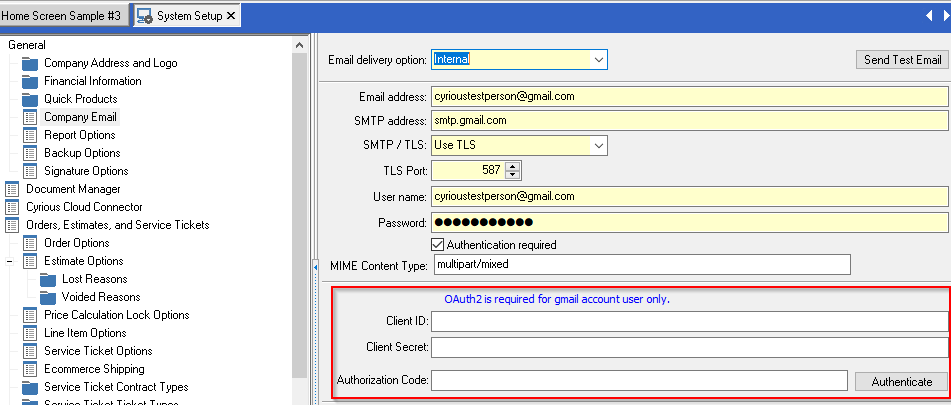
- Click the Authenticate button to the right.
Note: This creates an authentication token that will be used by Gmail. This is a lifetime code used by Google. - You will be asked to log into Google to provide consent. This only happens one time to confirm your identity unless you don't use your Gmail via Control for over 6 months.
Note: If you are prompted by your Firewall at all, please allow access to your private network in use. - Click on Advanced on the Google warning screen and then click on the Go to OAuth2 (unsafe) link
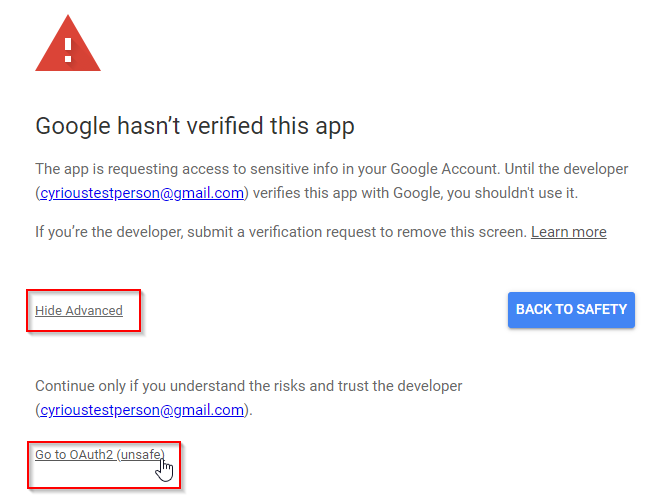
- Click Continue on the screen saying that OAuth2 wants to access your Google Account

- You will get a message stating OAuth Authorization Successful in your browser and you will also get an email saying that your app was granted access.

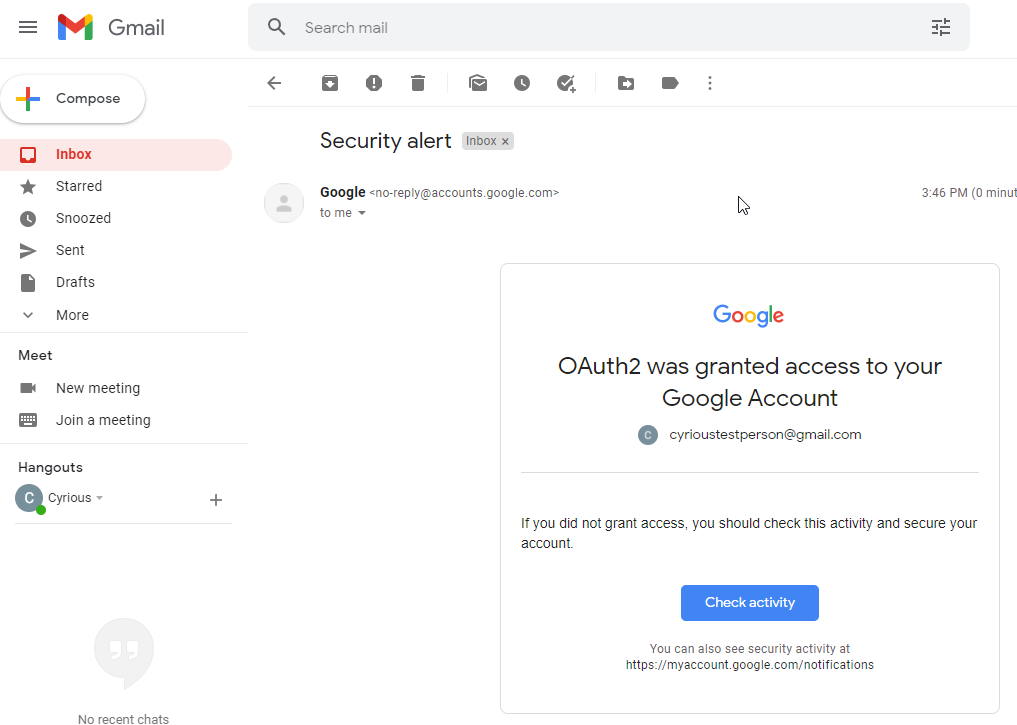
You can now close out of the browser window. - Go back to Control and notice that you now also have an Authorization Code. Do not press the Authenticate button again.

- Save your email settings at the top right of Control.
- Click Send Test Email > Click OK
- You should receive the test email shortly

- You are now fully set up to use OAuth2 with Gmail in Control. Contact Support if you have any issues with this after walking through all of the steps.
Error with the setup:
If your Gmail account is not set up correctly to use OAuth2 after May 30th, 2022, you will see an error message in Control like the picture below:
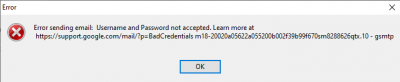
You may also see this message if your email address entered at the top of the email section in Control is not the same as the User (which is also your email address).